A LEGO system I am never going to sell
Today I printed a LEGO system. Not LEGO exactly — PEGHOLD: one connector, one grid, one height, for pen-and-paper RPG terrain. Fifteen parts, one spool of filament, no supports anywhere in the set.
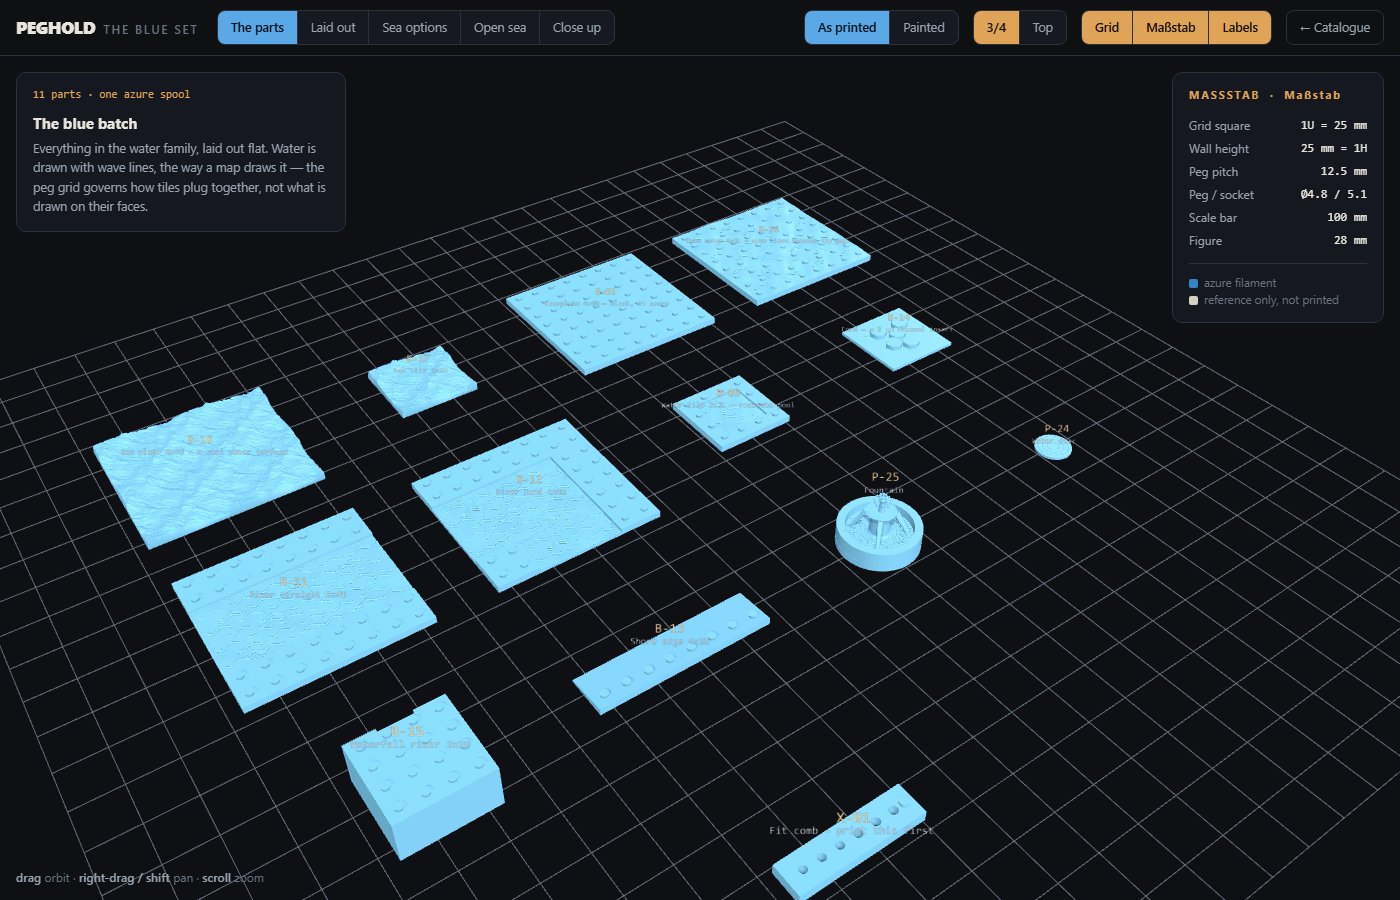
The peg is Ø4.8 × 1.8 mm, which is a LEGO stud, because there is no reason to be cleverer than that. The socket is Ø5.10 and 0.4 mm deeper than the peg, so a peg always bottoms out on the face rather than in the hole. That 0.3 mm of difference is the entire project. Too tight and nothing goes together; too loose and the castle slides apart when somebody leans on the table.
The catch is that 0.3 mm is my 0.3 mm. Every printer, filament and nozzle temperature disagrees about what a 5.10 mm hole is, so the first thing in the set is a tool: X-01, the fit comb. It is a real brick on the real grid — 50 × 25 mm, half a baseplate — with eight sockets on the 12.5 mm pitch, engraved 1 to 8, running 4.90, 5.00, 5.10 … up to 5.60. You press it onto a baseplate and then lift the plate by it. The smallest hole that still releases under a thumb is your number. Print that before you print anything else.
The most expensive number in the set
Baseplates were 4 mm thick, back when plates carried sockets and clip pockets on the underside. Once the underside went flat and LEGO-like, none of that was left, and 4 mm was just tax — paid again on every tile, forever, in filament and in print time.
It came down to 2 mm. Not to LEGO's 1.1 mm, though: injection-moulded ABS is tough, printed PLA is brittle across its layer lines, and 2 mm is twelve layers at 0.16. That is roughly the point where a 100 mm plate still survives being picked up by one corner, which is the only way anybody ever picks one up.

The four numbers
- Grid square
- 25 mm — one square, one storey of height
- Peg pitch
- 12.5 mm — half-square, so tiles can offset
- Peg
- Ø4.8 × 1.8 mm — a LEGO stud
- Socket
- Ø5.10 mm, 2.2 mm deep — the number you tune
- Wall
- 4 mm, straddling the grid line
- Baseplate
- 2 mm
- Layer height
- 0.16 mm, Ender-3 V3 SE, no supports
Everything else follows from those. Plates and tiles plug together so the ground stops sliding around mid-scene; walls straddle a grid line so a room measured in squares is a room. The plug grid is the base layer and the face of a tile is free — which is why a water tile and a floor tile are the same part with a different top.
Why it stops here
I am not going to turn this into a product. I am not going to upload it to Printables with assembly instructions, photograph it on a white background, and then answer tolerance questions about somebody else's Ender 3 for the next two years. That is a different job from the one I enjoyed today, and pretending otherwise is how a good afternoon turns into an obligation I will quietly stop meeting.
But it is a genuinely nice little system, and leaving it on my disk is a waste. So it goes here in the state it is in: no instructions, no support, no warranty that it prints on your machine. Print the fit comb, find your number, change one line at the top of the .scad file, and it is yours.